Showing posts with label tutorial. Show all posts

Thursday, January 26, 2012

[LuckyNo.5] Airbrushing Deux Razorwings - A Tutorial

My first article for MWC will be a step-by-step of how I painted my pair of Razorwings featured below. 

More final pics can be found HERE


Thursday, November 17, 2011

[Arid's Anomalies] - Necron Command Barge/Annihilation Barge Magnetisation tutorial!!

Hey folks.

Yup, I got bit by the metal- man bug. Those awesome new models and rules finally tore me away from my White Scorpions, and so here I sit, surrounded by half build robots and bits of glowy green plastic.

These new Necron plastic kits have one recurring theme; dual kits. Whether its Immortals/Deathmarks, Praetorians/Lychguard, or Ghost Ark/Doomsday Cannon, GW have decided to combine the two units into one sprue, and whichever unit you decide to build, there will be a lot of bits leftover. While this could mean more bits for our bitsbox (and lets be honest, who doesn't love the "shaka shaka" noise of a full and healthy bitsbox?), for the more... tightfisted of us, having the ability to swap out and change up our units from one to the other is a boon, and in my opinion, none more-so than the Command/Annihilation Barge. So, I therefore present to you my first tutorial!! YAAAY

Bear with me.....

Step 1:
Buy/Grab the necessary kit:

...and my mitts....
  • Necron Command/Annihilation Barge
  • Magnets, I use Neodymium 2x1mm round magnets for all my magnetisations, which I got here, but you can use something else if you think it will do the same job.
  • Pin Vice, obviously with a 2mm bit and a smaller one for paperclips.
  • Paperclips
  • Paint and Brush
  • Greenstuff
  • Scalpel/Modelling knife
  • Super Glue
  • Tea/Coffee/Beer/Tequila/Yaks Milk or whatever you want to drink, you decide I'm not your mother jeez

Step 2:
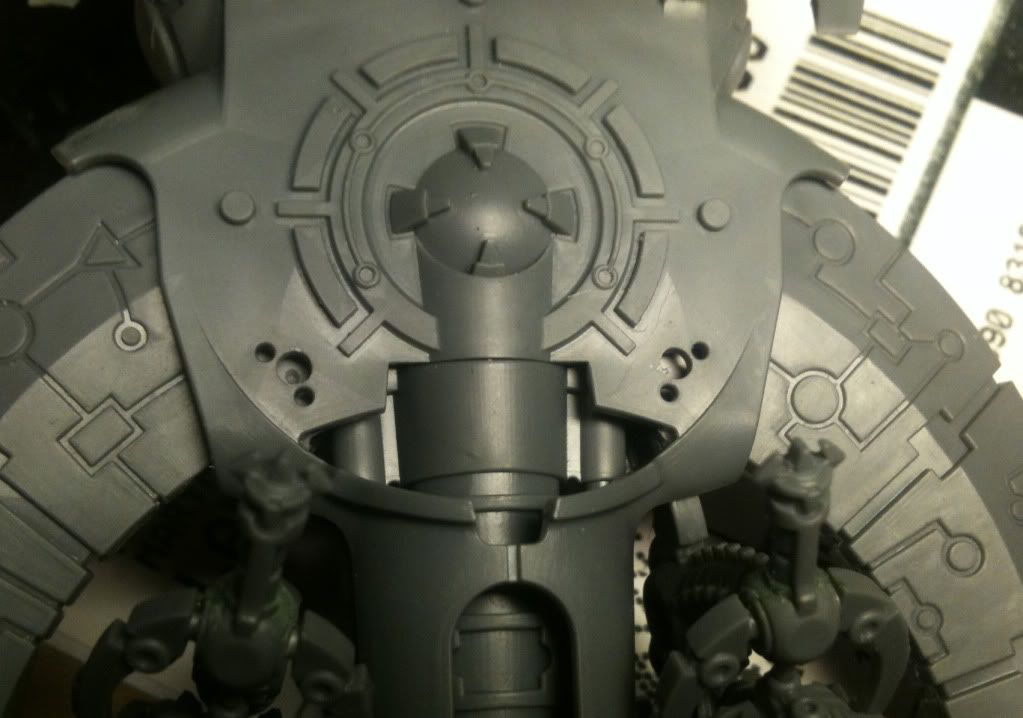
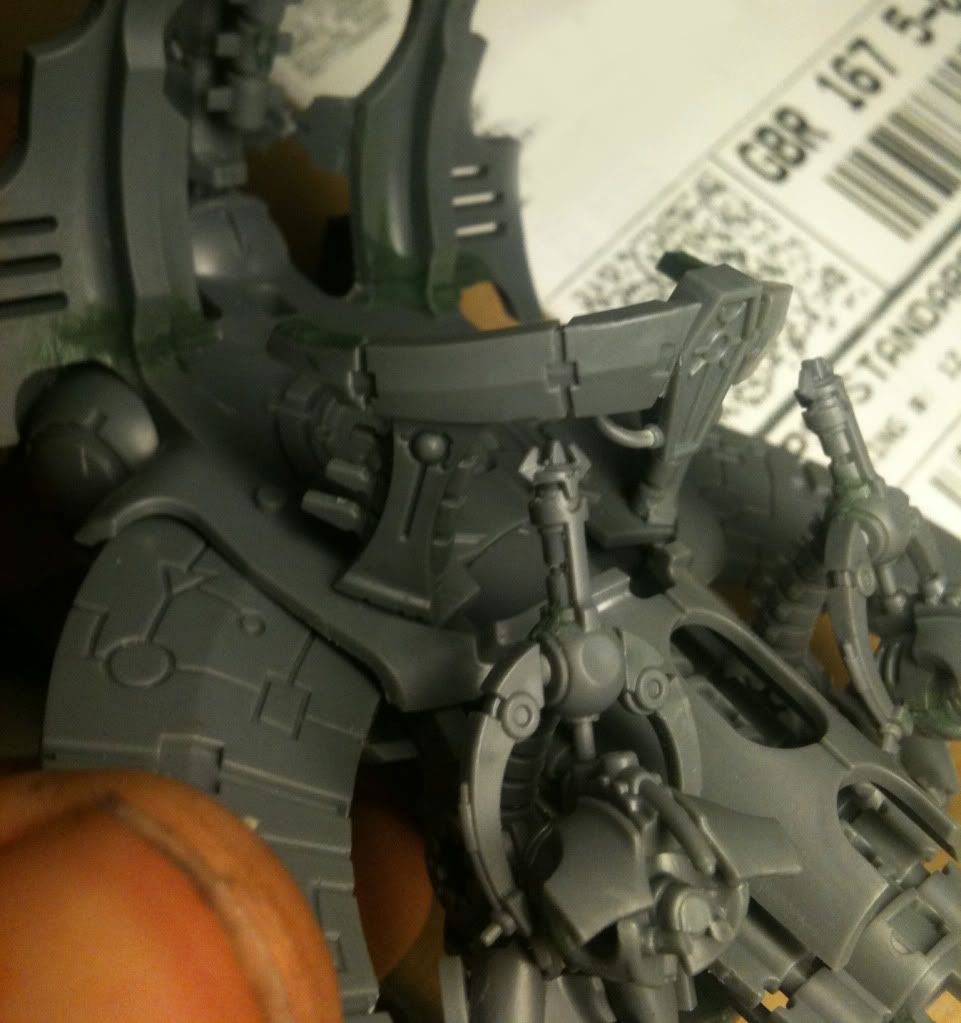
Assemble the model up until this step here:


Note that I left off the pilot/gunner console for ease of painting.


Step 3:
Get out your pin vice, and drill two holes with your 2mm bit between, and a little behind the two slotta holes made for the command console, as shown below:


Then, with your knife, hollow out the hole a fraction more, just so you can get the magnets in a little easier. Do not go overboard here or else you will have a helluva time getting your magnets to stay in place. You should end up like this:


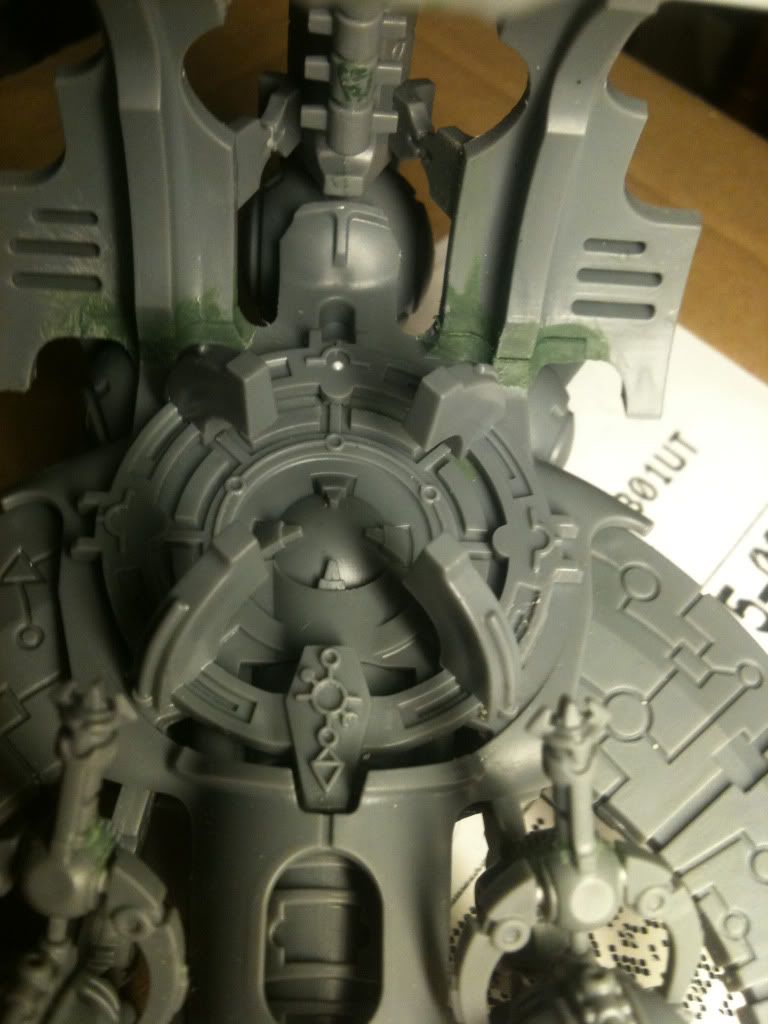
Now, you will notice three little plugs where the base for the Tesla cannons slot onto (you can see two of them on the left and right on the photo above), the rearmost one, i.e the one you cant see there ^^, cut off and drill your last 2mm hole where it sat previously. You should now have three holes ready to accept your magnets!!

You may be wondering why I didn't decide to just put the magnets where the three plugs sit, the reason being that I wanted as secure a fit as possible, and so the extra sturdiness given by having those two other plugs there was a good choice.

Step 4:
Now, take 6 magnets, and separate them into three sets of two. Grab your paint and paintbrush, and on the sides where the magnets are attached and attracted to each other, put some paint. This way, when gluing them in, you wont forget which way they go and end up with the magnets repelling each other rather than attracting, which would be a bit of a mess!!

Using your scalpel, pick up one of the magnets with the paint side facing the metal of the blade, then glue it into one of the holes. Take one magnet from each of your three pairs and glue them into each of the holes you have drilled but remember to have the paint facing up!! Like so:


I hadn't done the rear plug at this point, because I was working out how to do it as I went.
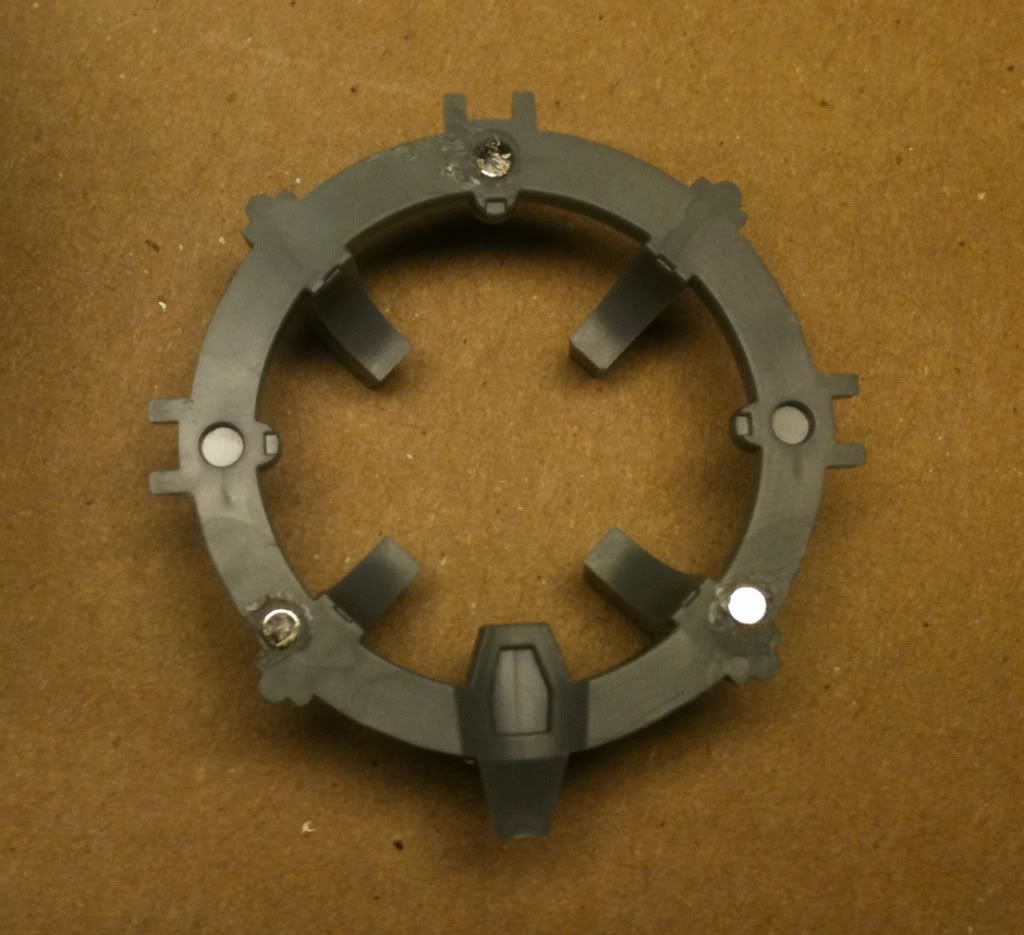

Step 5:
Now, take the base from the tesla cannons, and add a dot of paint to each of the already glued in magnets. Place the tesla base on top, slotting the plugs into the holes on the sides, and you will now have the exact place where to drill you next holes for your other magnets! Drill them out (be careful, the base isn't very thick and you dont want to drill all the way through) and then glue in your magnets, remembering to glue them paint side up again and you should have something like this:

My paint rubbed off on my fingers. Sorry.
And now, ta-da! You have a removable tesla destructor for when you want to blast your opponents troops into smithereens!!
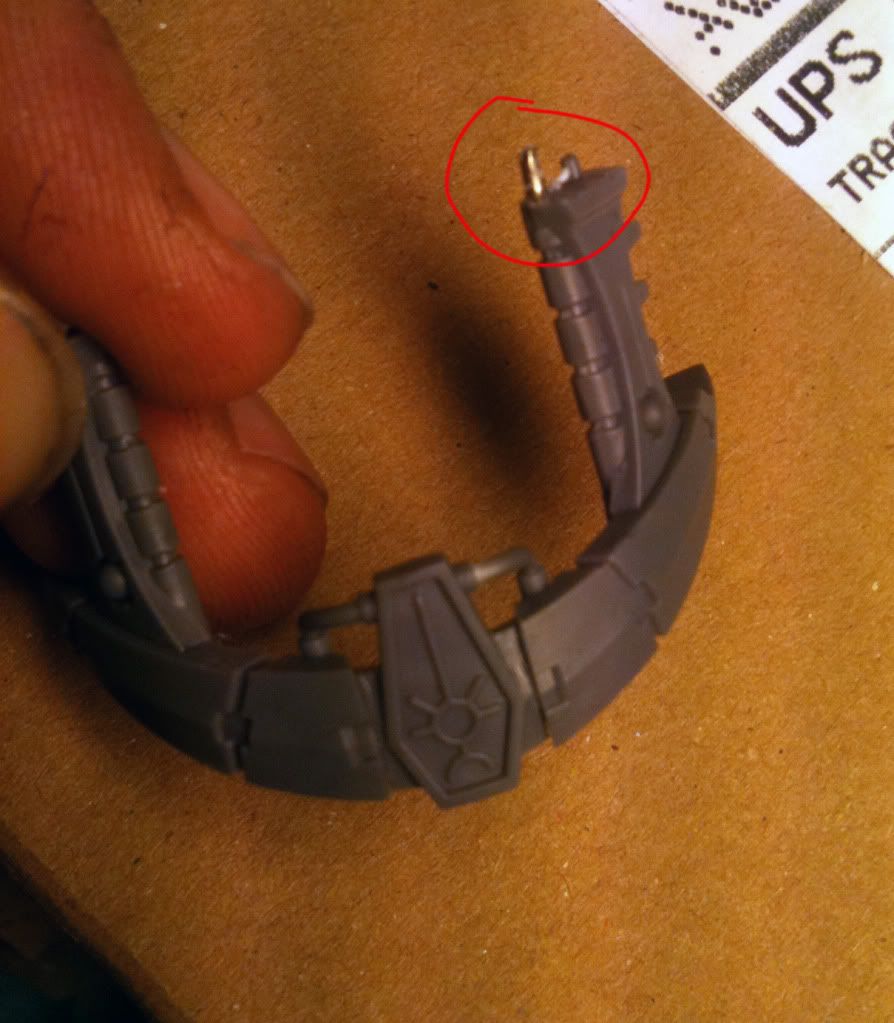

Step 6:
Now, for the command console. Where the little plastic pins sit on the underside of the console, is where we a re going to put in our paperclip pins so that the console can stand up without falling over, like so:


I would also advise drilling the holes on the barge itself a little deeper, and using a longer paperclip than I have done to make it that much more sturdy. And so:


Ta-da! You now have your very own changeable barge, ready for any occassion!!

Let me know what you think, and remember and follow my blog here for more of my new Necrons and other witterings!!

Wednesday, May 18, 2011

[The Rogue Trader] Bone Field Bases from Secret Weapon


I'd always thought Grey Knights were one of the cooler/fluffier chapters, and was really happy when the new codex was confirmed.  I'd been working my way through various Black Library offerings and picked up the Grey Knights book at this huge used book store near where I work.  It was a good read, but that is for another post.  The main thing was the memorable start where the Knights are attacking across barrow mounds, the dirt churning as the bones of the dead and undead come back to the surface.  Possessed and now trying, sometimes successfully, to drag the attacking Grey Knights beneath the blood soaked surface.

Friday, April 22, 2011

[The Rogue Trader] Rifleman Dreadnought Conversion


For a lot of people making the rifleman dreadnought is old news, and some of the conversions are very elaborate.  However, if you’ve never tried any conversion work or magnetizing, this one is really simple can be a great place to start.  Apologies for the paint job above.  It's not finished yet as you can see.  I'll come back an edit this post once I have a finished shot. OK, I stuck the old shot down the bottom.  Here's a new shot with something close to finished.

Firstly, why bother?  Rifleman dreadnoughts have been popular for a while.  A relentless gun platform dropping 4 48" range, S7 AP4 twin linked shots down the field.  What’s not to like.  Add the Grey Knight codex and those can become S8 so you can start glancing the armor 14 rolling your way.  The problem is, the only place to buy the guns necessary for this is Forgeworld, and they aren’t cheap.  You would be looking at $23 plus a lot of shipping for the Forgeworld option and it seems like they only have Mk IV right arms and Mk V left arms so they wouldn’t even match.

 For this conversion I used an AOBR dreadnought, $20 in the consignment case at my FLGS, and the Aegis Defense Barrier kit, $22.50.  Yup, I paid retail when you can get it cheaper.  Support your FLGS, they are always a key part of your gaming community.  I also used 4 magnets, a craft knife and a modeling bone saw as well as plastic and super glue.

 All you need to do for this is cut the studs off the side of the dreadnought and replace them with magnets.  Then, do the same on the autocannons from the Aegis kit.  Try and cut the studs as far back as you can so the arms don’t stick out too far.  Superglue magnets to the guns (make sure to check you’ve got the polarity right) and you are done.  Seriously, that is it.  Well you may want to dive through your bits box for a few purity seals or something, but really, job done.

 There are many ways to improve this if you want to spend a bit more time.  If you are assembling the dreadnought one easy alternative is to put the magnets inside as they are strong enough to work through the plastic.  Another popular option is using plasticard to make some panels covering the back end of the guns, or even make a complete dreadnought style angled shoulder.  The other common direction for this conversion, if you have a full dreadnought kit, is to clean up the TL las cannon and missile launcher and attach autocannon barrels to them.  I’m not a big fan of that route though as you end up with mismatched arms, and lose the option to ever use those parts if you want to run a different dread build.

 Lastly, as an added bonus, that Aegis defense kit has another great conversion bit in it.  The circular mount that the autocannons would have been on fits the back of a razorback.  You know, that razorback that has been stuck with the TL heavy bolters you glued on when you bought it.  Now you can go back through the bits box, find a lascannon and a couple of plasma cannons and make yourself the Las/TL Plas turret that is currently in vogue.  Of course the Aegis kit also had all the wall parts and some other nice bits that will make good scenery on your table.  Really a good value kit.

Hopefully this showed you how easy some conversions can be and will get you interested in some more advanced stuff.  At the least it helped you get a decent, but not in production unit on the table.  Something we often have to work around with GW.

Marcus

Monday, April 18, 2011

[Adept Zero] Speed Painting with Dipping


Care for a dip? Hello, dear readers. Zeronyne here again from Hive Zero. Tonight, I'm going to show you a common technique to get horde armies to the tabletop as quickly as possible. There are dozens of dipping tutorials out on the Interwebs, and they are uniformly (and surprisingly) great, but I thought I'd show you how to dip with the absolute least number of steps and without any special gear. You can view any picture by clicking on it.

Thursday, April 14, 2011

[The Rogue Trader] - Cheap Knights


With the high price of the Grey Knight Strike Squad box I wanted to see if I could stretch the value a little bit.  I'd made a basic strike squad, Justicar with Daemon Hammer, Grey Knight with psycannon, three Grey Knights with Force Swords.  This left me with a good range of option pieces, part of why the set is so expensive.  So I gave some thought to what I'd need to make a second squad out of this set.  A couple of eBay purchases later I was on my way.